How to Test for Asbestos

What is Asbestos?

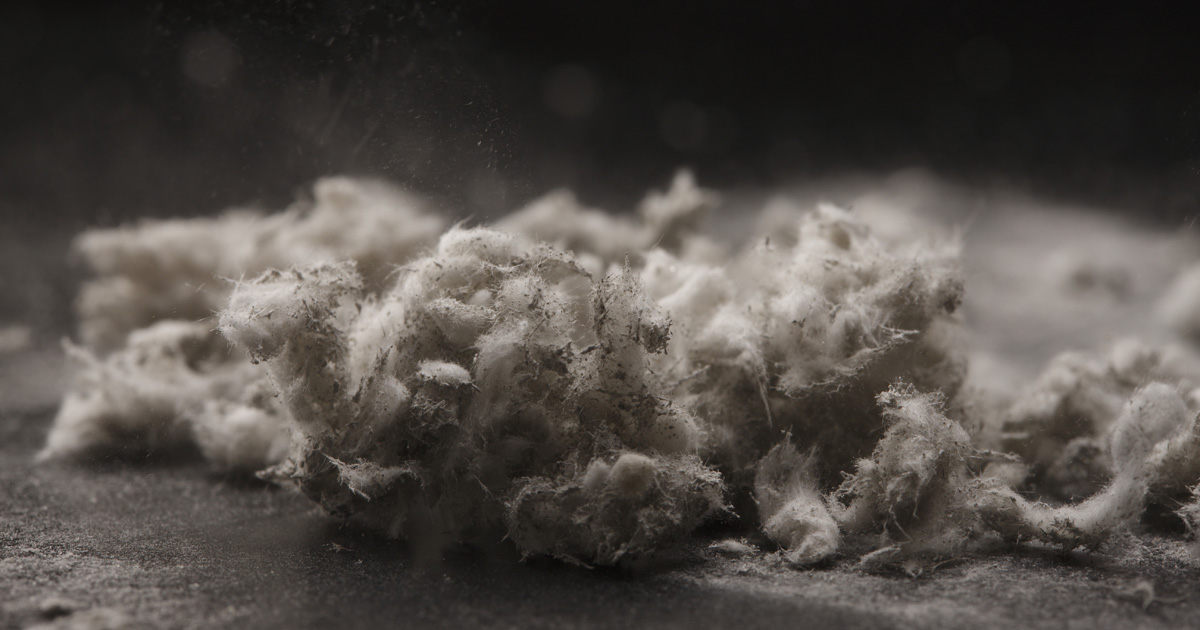
Asbestos is a mineral substance found in rock and soil and is resistant to heat and electricity. It can be pulled it into a fibrous, fluffy consistency so for many years, it was used widely in flooring, ceilings, insulation and concrete in homes and industrial buildings.

The extremely abrasive and microscopic fibrils in asbestos are invisible to the naked eye, so you could be exposed to it without ever knowing.

Why Asbestos Tests are Important

Asbestos can be deadly when inhaled, and should you find it in your home, take steps to lower the chance of it contaminating the whole house. Asbestos has been proven to cause severe lung damage and is a known carcinogen.

For this reason, it is vital that you understand how to test for asbestos before doing construction on any property. Before any demolition project can take place, you or a professional must take steps to confirm that there is no asbestos on-site.

Since asbestos cannot be detected with the naked eye and can be in a wide variety of material on the property, it is important to test for the substance before you do any work that might disturb and release it.

Who can Test for Asbestos?

Asbestos is dangerous enough to require serious protection even just for taking samples of it. Some states in the US do not also allow you to gather the material to send for testing yourself and require that EPA certified contractors conduct all tests.

Check your state’s laws on asbestos testing and removal before attempting it as your next DIY project. If it’s legal where you live, you can purchase an asbestos testing kit for around $50.

Step-by-Step Guide to Testing for Asbestos

For your safety and long-term health, take extreme caution when testing for asbestos. If you are at all unsure of your ability to carry it out testing safely, you should have an EPA-certified contractor handle it.

1. The first step in asbestos testing involves ensuring that the air in the space where you are testing is still. Making sure to close all windows and shut off all fans, heaters and air conditioning systems.

Do not attempt to clean any area or item that you wish to test as there could be asbestos particles in the dust on the surface of the area.

2. Once you have ensured that the air in the space is “dead” and all the dust has settled, you can equip all of the necessary protective gear. Make sure that you cover your body from head to toe.

Safety gear should include:

  • Face mask/respirator
  • Gloves
  • Coveralls or full body clothing that covers all skin surfaces
  • Shoe protectors
  • Eye protection (mask/goggles)

All protective equipment that you wear during testing will need to be thrown away afterward.

3. Once your safety equipment is on, you can enter the testing area and begin to prep by laying down plastic sheeting on the ground that will catch any potential asbestos particles that fall.

4. Next, spray the whole testing area down with water using some misting or squirt bottle. When all of the surfaces are wet, and the air is humid, you can ensure that any dust created will quickly diminish.

5. Working as carefully as possible, use a utility knife or a chisel to carefully break away a piece of the object or material that you wish to test. Using extreme caution will help to minimize dust residue breaking off.

6. Using your same misting bottle from before, spray down the piece that you broke off to settle any dust. Make sure that the sample size that you obtain is between 5 and 100 grams in weight.

7. Using a pair of pliers, drop the sample into a Ziploc bag and immediately seal it up. On the outside of the bag, be sure to note information about the sample including; where it was taken from, when and what it is. Slip that bag inside another zipper bag and seal that one up as well to ensure it is secured.

8. Now you can start to clean up the area. Very carefully, gather up the plastic sheeting and drop it into a plastic garbage bag and seal the top of the bag with tape to securely trap any fibers on the inside.

9. Next, vacuum the area thoroughly with a vacuum that uses a bag. (A bagless vacuum will potentially leave a residue on the inside of your vacuum and contaminate it.) Be sure to throw the used vacuum bag in a plastic garbage bag when you are done and seal it up.

You can also take another wet rag and wipe down the area where you took the sample from and dispose of that rag as well. Apply a coat of heavy duty paint directly to the area where you collected the sample. The paint will help seal in any leftover particles and prevent them from flaking off.

10. Finally, remove all of your protective gear and immediately throw into a trash bag and seal it off with tape. Take a shower to rinse off anything that may have been in contact your skin.

Submitting Your Asbestos Sample

At this point, you are ready to submit your asbestos sample to an EPA-approved laboratory for testing. To find a testing center near you, you can check the EPA’s website which will also have detailed instructions for how to safely and adequately submit your sample.

An asbestos submission by a homeowner can take a month or more to process, so it is essential that you build this time into your project deadlines as you should not start any work that could disturb the interior of the building before you have the results of your test.

If you have a tighter deadline, samples collected by professionals are usually tested within 48 hours of collection, so professional services can save you a lot of time.

If your results test positive for asbestos, contact an EPA-certified contractor to begin the asbestos removal process since removing and disposing of asbestos requires a special license in most states.

Honeywell IPCAM-WOC1 Outdoor Security Camera Review

Honeywell has just informed us that their latest wireless outdoor security camera, the IPCAM-WOC1, will become available to customers in early February. Announced in the latter half of 2017, it will be the first of their Total Connect-compatible security cameras that’s designed for outdoor use.

The new camera features:

  • Compatibility with Honeywell Total Connect 2.0 and Lyricâ„¢ security and home control systems
  • Simple set-up with QR code installation and multiple mounting options
  • Expansive Cloud Video Storage or Local Storage
  • Enhanced Wi-Fi® connectivity and range with 802.11n
  • Wide angle views and sharper night vision with up to 1080p resolution

To figure out what distinguishes this device from the two previously-released indoor cameras (WIC1 and WIC2), let’s take a closer look at the specs.

Download our FREE Ultimate Guide to Home Security to get all the information you need about how alarm systems work, what system is right for your needs, and how to secure your home.

Switch Your Existing System

Image Sensor: Sony IMX323

Sony released the IMX323 in 2016 and designed this sensor to be both compact and cost-effective, delivering 1080p video at a lower cost than its competitors. One of the strengths of the IMX323 is its effectiveness under low-light conditions, which shows in the WOC1’s ability to see up to 65 feet away in the dark. You can see the difference in these photos below.

sony imx323 image sensor

(Source)

Field of View: Diagonal View Angle 117°; Horizontal 113°

You might have noticed that diagonal view angle is lower than the WIC1 and WIC2, which have a 135° and 138° view angle, respectively.

In contrast, the WOC1 has a slightly larger horizontal field of view. So while the WOC1 might have a smaller field of vision overall, its horizontal field of view makes it better for what it’s designed to do: watch over driveways or pathways.

Digital Zoom: Up to 10X Digital Zoom

Zoom and enhance all of the details that the WOC1 is capable of picking up with its approximately 2.19M pixels! 10X zoom is significantly greater than any of its predecessors, making the WOC1 better at picking up things like facial features and license plates.

Motion Detection Zones: 4 active motion detection areas

Isaac Blog Post V2.png

The WOC1 uses the same number of motion detection areas as the WIC2, but this time Honeywell is allowing users to change the sensitivity as needed.

For example, if you want to pick up people and animals on your front porch but not vehicles moving around in the street, you may want to lower the sensitivity and change the settings so that the motion detector only focuses on the zones closest to you.

Operating Temperature and Weatherproofing

The ultimate question: can this camera survive a New England winter? We reckon that with an operating temperature range of 14°F to 131°F, the WOC1 will be fine as long as you don’t try to install it somewhere in Vladivostok.

Something like the record-breaking low temperatures and heavy snow during the polar vortex of 2015 would probably not be good for the camera’s longevity, but we expect the camera to function even if the weather drops below or above Honeywell’s stated minimum and maximum operating temperatures.

As for weatherproofing, the camera is protected by an IP66-rated housing (meaning it can withstand torrential downpours and is totally protected from dust), but the wires that provide power to it are NOT weatherproof (thin wires rarely do well in events like snowstorms), so keep that in mind when setting it up.

Microphone and Audio

Unlike Honeywell’s indoor cameras, the WOC1 doesn’t have a microphone or any audio capabilities. Although some outdoor camera brands do add a microphone, installing such devices puts you at risk of recording people’s conversations without their consent, which is illegal.

Also, a microphone on an outdoor camera would primarily pick up the sounds of cars driving by, doors opening, and footsteps.

If for whatever reason you need your outdoor camera to pick up sound, you should look for an alternative solution.

We believe in providing our customers with the most up-to-date info on cutting-edge security technology so that they can make more informed decisions. Want to add a WOC1 camera to your Alarm New England-monitored system?

Customize your security system using our free tool in the link below and we’ll get you a quote within one business day.

customize your system »

How to Prevent Pipes from Freezing

When the weather turns frigid, you are at a high risk of pipes freezing and potentially bursting. Burst pipes are one of the most common causes of home damage in the winter months and the cost to repair both the pipes and potential water damage this can create is significant.

The good news is that you can prevent pipes from freezing by being diligent, taking protective measures and knowing the facts.

Which pipes are most vulnerable to freezing?

Some pipes in your home are more susceptible to freezing than other simply because of their location in your home. The pipes that are at the highest risk for freezing are:

  • Pipes that are exposed and located in unheated areas of the home (basement, garage, etc.
  • Pipes found in exterior walls
  • Any pipes located on the exterior of your home

Frozen Pipe Prevention

As soon as winter approaches and temps start to drop, you should be thinking about taking measures to keep your pipes out of the danger zone for freezing. Experts suggest that the threshold to keep in mind for freezing pipes is when the temperature reaches 20 degrees Fahrenheit or below.

Here are our top prevention tips to help you beat the cold and keep the water running:

  • Open the doors to your kitchen and bathroom cabinets to allow the pipes to be exposed to the warm air circulating in the room. When the cabinets remain closed, they have less of a chance of benefiting from the warm air in the rest of the room.
  • Open any faucets with exposed pipes to a slow drip of cold water. Keeping water running through the pipes will help prevent them from freezing.
  • Install a low-temperature sensor. When the temperature drops below a certain threshold, the low temperature sensor will notify you via your keypad, phone, email, or whatever method you have set up. Some sensors also produce an audible alarm. Install it anywhere in your home within minutes and always be in the know if your home becomes dangerously cold.
  • Keep your house warm. Many people turn down their thermostats when they are sleeping or away, but it is not wise to do so in extremely cold weather. In fact, if you plan to leave your home during cold weather months, be sure your thermostat is set no lower than 55 degrees.
  • The ultimate step in frozen pipe prevention is to add in insulation to the areas where pipes are prone to freezing. Ideally, this should be done before the cold weather season so you have time to ensure all the exposed pipes are covered.

What to Do in the Case of a Frozen Pipe

If, despite your best efforts, you end up with a frozen pipe, there are several steps that you can take to thaw it.

Frozen pipes need to be handled with caution, they are at a high risk for bursting and flooding your home with water. If you discover that a pipe has already broken or burst, immediately turn off the main water supply to prevent further flooding and damages.

If you have a frozen pipe, but no burst, you can do the following to alleviate the situation:

  • Run water through the frozen pipe. There is usually an ice plug somewhere inside the pipe and as it starts to melt, running water through the pipe assist in the melting and break up of the ice plug.
  • Apply heat to the affected pipe. There are many things you can use to apply heat to the pipe such as; a blow dryer, space heater, heating pad or there are even specialized heating tools designed for frozen pipes that you can purchase. DO NOT use any kind of heating tool that has an open flame as this is a serious fire hazard and could also melt your pipes.

Continue to run the water and apply heat to the pipe until you see that full water pressure has been restored in all of your faucets.

If you are unable to locate the source of the frozen pipe, are uncomfortable attempting to thaw it on your own or cannot access the pipe safely, be sure to call a certified plumber right away to provide professional assistance.

Unfortunately, frozen pipes in the winter are a common occurrence. Luckily, it is preventable if you take the necessary steps to prepare your home for the cold winter season.

First and foremost, if you know that your pipes are prone to freezing due to their location in your home or their lack of insulation, the best solution is to be prepared. Whether you take on the job yourself, or call a professional, the key is to do it before cold weather strikes to prevent a burst pipe.

5 Tips to Prevent Frost on Windows

If you live in a cold climate, you have likely seen frost accumulate on the windows in your home. While the frost may look pretty and add to the winter ambiance, it is not good for your windows.

Older homes often feature single pane windows that don’t protect against the cold as well as modern windows. Seeing frost on your windows used to be fairly commonplace, but thanks to new window technology, our windows and homes are now better protected from the cold.

Here’s how you can protect your windows from getting damaged by frost.

Why Frost Forms on Windows

Frost forming on your home’s windows requires two atmospheric conditions; cold air on the outside and moist air on the inside. When these two conditions are present, the moist air on the inside of the home is drawn to the cold windows.

When the temperature outdoors gets below the dew point, the water vapor on the windows will begin to solidify into a liquid which then will freeze making ice crystals.

Single pane windows, most commonly used in older homes, are most susceptible to developing frost. More modern windows are armed with double or triple panes which help to prevent moisture from seeping in.

Why Frost on Windows is Bad

While it may provide a picturesque winter scene, frost is not good for your windows or your home. Frost can cause damage as it melts because it transfers moisture to whatever is next to it. In the case of your windows, it is usually a wooden surface.

If left untreated, you will begin to see paint and varnish peeling and damage to your wood. Eventually, mold will start to grow, and with it, a whole new host of problems and dangers for your home.

How to Avoid Frost on Windows

There are several things you can do around your home to avoid frost – and it’s effective even on older single-pane \windows

  • Make sure there are no plumbing leaks in your home. Even something as small as a slow leaking faucet can create excess moisture in your home.
  • Run a dehumidifier. This helps reduce the amount of moisture inside your home.
  • Make sure your home is heated properly. Keep the temperature in your home sufficiently warm at night time to reduce the possibility of frost forming.
  • Don’t hang clothing up to dry indoors. If possible, put clothing in the dryer instead of hang-drying during the winter since this will add moisture to the room.
  • Soak up any visible moisture on windows. If you see condensation on your windows dry it up with a towel before it can turn into frost.

If all else fails and you continue to have problems with frosty windows, your best bet is to invest in double-paned windows that will help to prevent frost and subsequent damage to your home.

Radon Testing: Tips Every Homeowner Should Know

Radon is a radioactive gas that causes cancer. Although you cannot see, smell or taste radon, it still may be lurking in your home causing major health concerns. For this reason, it is crucial that you do a home radon test to make sure that you and your family are not at risk from exposure.

Radon is the second leading cause of lung cancer in the United States, according to the EPA. Testing your home is the only way to know if you have dangerous levels of radon. It is recommended that all floors below the third be tested.

radon-gas

There are a couple of different options for radon testing; you can purchase a home radon test kit or you can hire a professional. If you are living in a home that you are not sure when it was last radon tested or you just want to have some piece of mind, a do it yourself radon testing kit will suffice just fine.

Professional radon tests are most commonly used when you are going to buy or sell a home and need accurate, documented radon levels in order to complete the transaction. Or, if you used a home radon test and would like to confirm the results with a professional, this is also an option.

The radon testing cost will vary depending on whether you choose to do a home test or hire a professional.

Do it Yourself Radon Testing

You can purchase a home radon test online or from your local home center or hardware store. You can expect that the radon testing cost will be between $10-$40 depending on the kit. Some states offer low-cost or even free radon testing kits, you can contact your state’s radon office to find out more.

Radon-Testing-Kit

Each kit will have included instructions, but in general this is the protocol you will follow to test your home for radon:

  • Testing should begin only after all doors and windows in your home have been closed for at least twelve hours.
  • You will then place the radon detector in the lowest livable area of your home and leave it alone for the next 48-96 hours.
  • After the recommended time is up, you will then immediately package and send the detector to the lab specified on your kit to be tested. Results will be delivered back to you.

Do-it-yourself radon testing is easy to do, affordable and highly accurate. This is a great choice for most homeowners to make sure that their home is not emitting dangerous, cancer causing gas that could harm their family.

Read More: Sources of CO Poisoning in the Home

Professional Radon Testing

Professional radon testing involves a nationally or state trained and certified radon specialist coming to your home and performing the test for you. Professional radon inspection is often included in a home inspection and will cost around $150 on top of the home inspection cost.

If done separately, you can expect to pay upwards of $250 for this professional service. The most important thing is that you know and understand your home’s radon levels to make sure that you are not being exposed to this potentially deadly gas.

X

GET FREE QUOTE

What are you protecting?*

Step 1 of 4

Is your property currently monitored?*

Step 2 of 4

What size is your property?

Step 3 of 4

Who is this personalized quote for?*

By clicking this button, you consent for Alarm New England to use automated technology to contact you at the number provided. This consent is not required to make a purchase from us.

Step 4 of 4