Looking to upgrade your existing wired alarm system? Look no further than the Honeywell Vista-20P Wired Security System. The system is cost-effective and combines the best of both a hardwired system and wireless technology.
Rather than replace your entire wired alarm system, use the Vista-20P to customize and update your home security without breaking the bank.
How Does the Honeywell Vista-20P Wired Security System Work?
The Honeywell Vista-20P Wired Security System is mechanical, and as the name suggests, it works by bringing together the vast collection of wires that are placed in the walls of your home to create connections between the various sensors that make up your security system.
The Honeywell Vista-20P’s rock-solid reputation for quality and its ability to accommodate a wide variety of wired systems make it the ideal wired solution for many of our customers.
To get into the nitty-gritty, a wired system works through a relay. It incorporates an electromagnet, which becomes magnetized when electric current runs through a circuit, which then opens or closes another circuit. Simply put, they are used to turn switches on and off. While this relay functionality is fairly old technology, wired systems like the Vista-20P are known for their consistency.
As this particular control panel works on these kinds of relay-based principles, setting up the Vista-20P requires specialized wiring knowledge best left to skilled technicians or electricians.
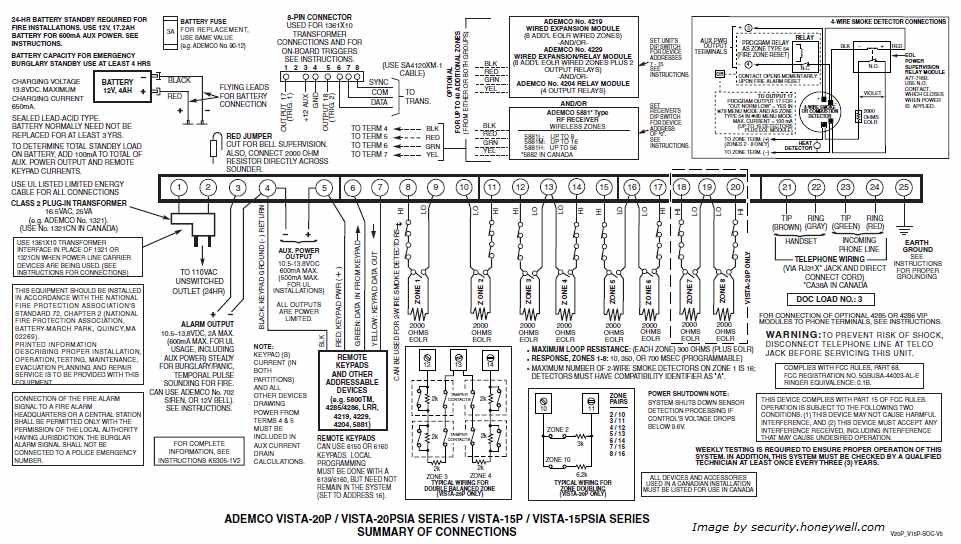
The Vista-20P is designed to connect to each sensor via the electrical wiring in the walls of your home, and its versatile control panel is a blank slate from which you can add all kinds of cutting-edge functionality.
For example, you can connect the wired Vista-20P to a wireless receiver and use wireless devices. This way, you can use a combination of both wired and wireless sensors when setting up your home security system.
Style of the Honeywell Vista-20P
Think of the control panel as the “main brain” behind all of the other sensors and devices that you’ll be using to monitor activity and movement throughout your home. Most of the wires that connect your security equipment are safely and invisibly threaded through the walls of your home.
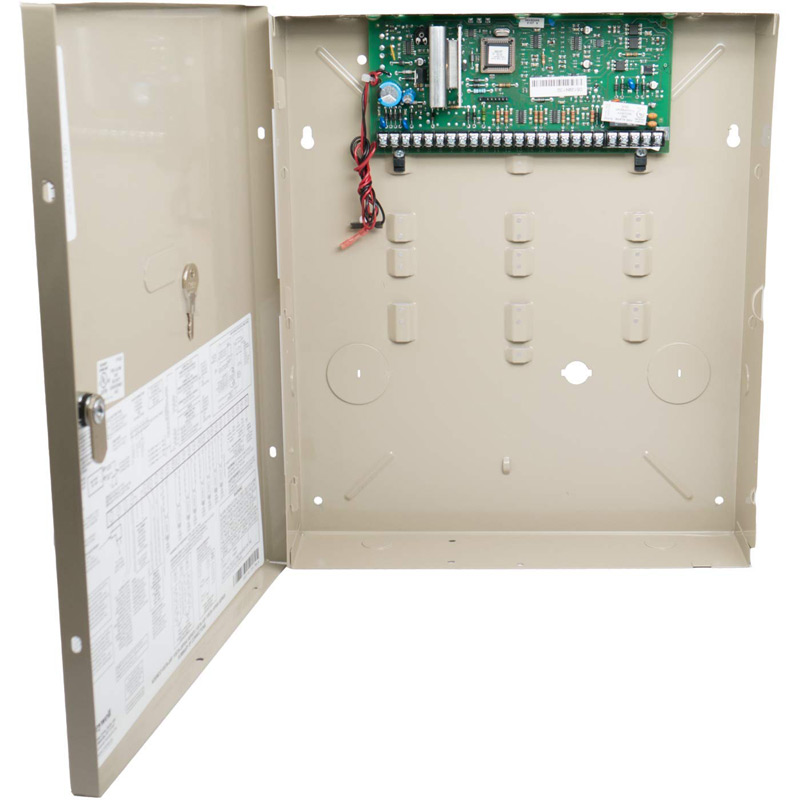
The Vista-20P control panel consists of a circuit board housed in a metal frame, which protects the panel from dust and tampering.
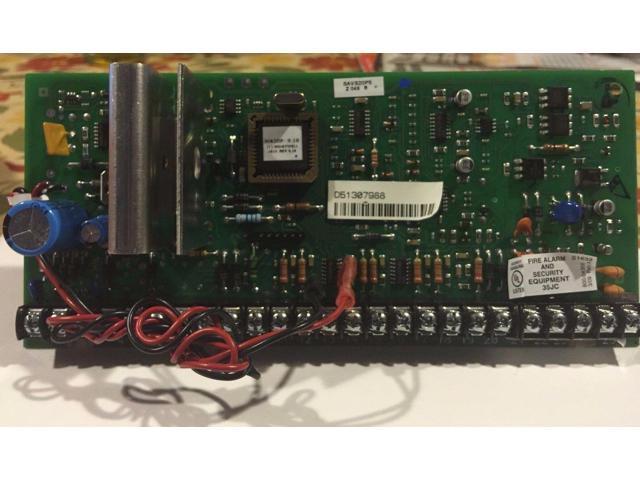 It might not be something that you’d want to show off in the foyer of your house, but in your basement or in a closet, the Honeywell Vista-20P control panel will be the silent, sturdy hub for all of your connected home security devices.
Honeywell Vista-20P Features
The Honeywell Vista-20P can support up to 48 zones and 8 keypads.
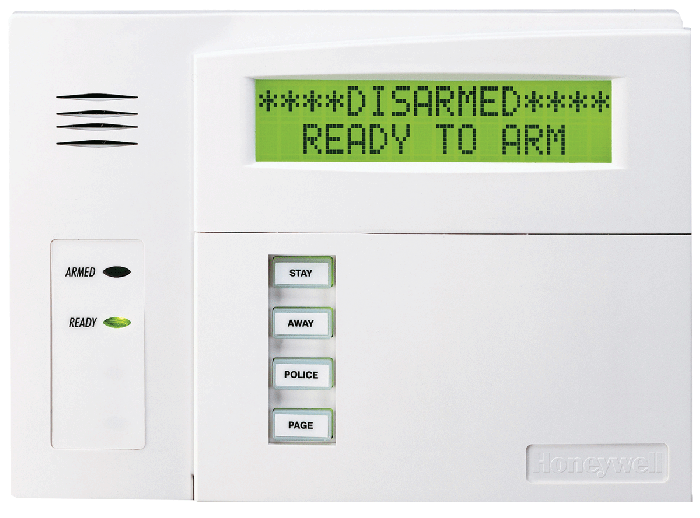
The control panel itself doesn’t come with a digital interface, but it is robust and can be integrated with a variety of additional display devices to add functionality.
 For example, you can use the Honeywell Vista-20P with a Tuxedo Touch Keypad (see above) if you want touchscreen functionality or a 6160RF keypad if you’d prefer something with physical buttons.
In addition to the easy-to-use interface, the Tuxedo keypad has a built-in Z-Wave controller to communicate with Z-Wave devices like smart locks. With the Total Connect smartphone app, you can control your system from anywhere as long as you have an internet connection.
The app will also let you arm and disarm the system remotely, change user codes, and get notifications when alarms and other events occur.

You can also set up dual partitions, which allows you to separately arm and disarm parts of a single property while paying only one monitoring fee.
For example, a homeowner in a multi-unit home who rents out a portion of their home can their portion of the house separately from the tenant’s portion.
Wired systems rely on electricity, which means that ordinarily if your home were to lose power, your system will go down. But not so with the Vista-20P—it can accommodate a 12V 4.5Ah battery backup. This will keep your system up and running for about 24 hours in the case of a power failure.
Benefits of the Honeywell Vista-20P
Instead of spending a lot of money replacing an old alarm system that still works, purchasing the Honeywell Vista-20P is a more cost-effective way of breathing life into an older, wired system.
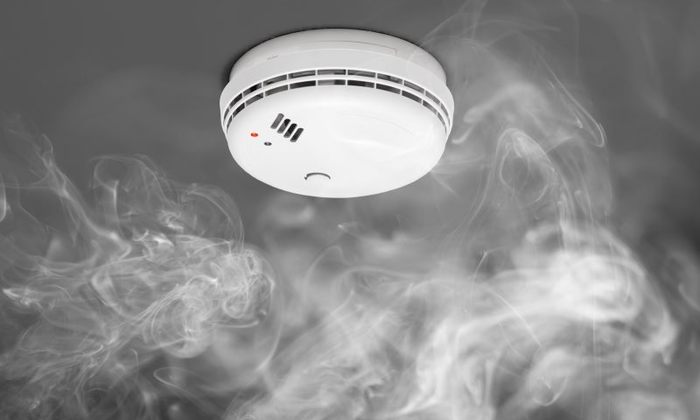
Besides saving money, you’re also creating a bridge between old and new systems. For example, you can use the Vista-20P to call the police, fire department, or other emergency services automatically through a wired landline connection, and you can combine it with other monitoring accessories to detect floods, smoke, fires, low temperature, and, of course, burglaries.
With the ability to integrate with wireless receivers, hardwired alarm devices, and alarm keypads, the customization options are virtually endless. In fact, when it comes to additional functionality, you’re only limited by your budget.
The Honeywell Vista-20P wired security system really is the best of both worlds: You can have the reliability of a hardwired alarm system coupled with the convenience of modern wireless add-ons.
If you’re looking for a cost-effective way to make use of the existing security system in your home, installing a Honeywell Vista-20P wired security system will give you peace of mind and give you upgrade options when you want them down the line.